Friday, October 14, 2011

Creamy mashed potatoes topped with cheddar cheese broccoli


Having a hard day? Try some creamy mashed potatoes topped with cheddar cheese broccoli to help de-stress and enjoy a delicious dish of comfort food. 


Ingredients:

1 head of broccoli
1 1/4 cup shredded cheddar cheese
1 tsp. minced garlic
2 large golden potato
2 Tbs. butter
2 Tbs sour cream
**milk, as needed, to make more creamy**
Salt and pepper to taste

Method:

1. Peel potato until all skin has been removed, then chop up into small pieces (about 1 inch chunks)
2. Place potatoes into a deep pot. Next, fill up the pot with water until it is slightly covering the potatos. Boil on high for about 10 mins. or until the potato is tender.
3. While the potato cooks, start chopping up the head of broccoli into individual florets and grate the cheese.
4. Once potatoes are close to being done, heat up a saute pan and add olive oil and garlic.  Saute on high for about 20 seconds, then add the broccoli (turn down to med) and continue to cook until tender.
5. After about 10-20 mins. the potatoes will be close to done. Once tender, drain potatoes and mash until smooth. To make them creamy, add butter and sour cream along with salt and pepper for flavor.
6. Right before you serve, put the cheese on the broccoli and let it melt until ready.
7. Finally, plate mashed potatoes, add broccoli on top and enjoy! 


Who ever thought that cheddar cheese broccoli could be so delicious! This recipe is so simple and delicious, anyone can try it. I first thought of this one night when I got home from school and was craving so many different flavors and textures but didn't know what I wanted to eat. I knew Dana would be coming home and wanting something to eat right away, so I thought why not make her favorite mashed potatoes. Personally, I am not a HUGE mashed potato fan like she is, so I wanted something that I would favor as well. I am definitely a green type of girl, for I love most vegetables, including broccoli. However, my ultimate weakness is cheese. I have no idea why I crave it as much as I do, but there is no way I can part with it, no matter how hard I try. So, after my whole thought process, I decided to combine my love for broccoli and cheese along with Dana's love for mashed potatoes. This resulted in one of my favorite hearty dishes. Granted this probably has a million calories and isn't considered on a health track, however, it is satisfying and worth the occasional splurge. Sometimes, the most simple dishes could soon become the favorite in the family. So, if you are a lover of creamy, light, flavor packed mashed potatoes, along with salty, cheddar cheese goodness with a hint of vegetables, then this dish is for you! I hope you enjoy it just as much as I did :) 

Monday, October 10, 2011

Crispy Chicken Tenders


Bring out the child in you by feasting on the best finger food in the world, fresh crispy chicken nuggets. 


**recipe adapted from gluten free cooking About.com

Ingredients:

1 package of chicken tenders (cut up into smaller bite size pieces) 
1/2 cup gluten free flour blend (Bisquick)
1/2 teaspoon of salt
1 teaspoon of fresh ground pepper
A pinch of of garlic salt
1 large egg and 1 tablespoon of olive oil, whisked together
1 cup crushed gluten-free rice chex
1/2 cup of vegetable oil for frying

Method:

1. Take the chicken tenders out of the package and cut into smaller pieces. Place the pieces in between two sheets of plastic wrap and gently pound until lightly flattened. 
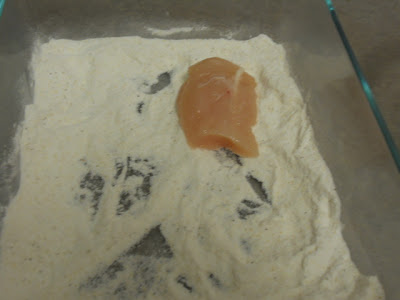
2.  Next, set up the three stations in which you will bread the chicken nuggets. First is the gluten free flour in which you will completely cover the chicken piece. Second is the egg wash which is the egg and olive oil mixed together. The third step is coating the chicken in the crushed up rice Chex. 
*** Your fingers will get messy, but that is half the fun!**
3. Place the freshly coated chicken on a baking sheet in prep for the frying processes. 
4. Place 1/2 cup of vegetable oil in the frying pan or enough so it is 1 inch from the bottom. 
5. To test if the oil is ready throw in an extra piece of crushed up Chex to see if it bubbles. If it bubbles then the oil is ready. 
6. Gently slip in the chicken nugget into the oil. But be careful  not to splash it everywhere! It will take roughly 3-4 mins. per side but make sure you watch it. These chicken nuggets burn easily. 
7. Take out the nuggets and enjoy!!!

Who doesn't love chicken nuggets!!! Dana came home from work one night and demanded we made chicken nuggets for dinner. I was more than thrilled with this demand however, I was unsure how it would work considering they had to be gluten-free. Dana found a recipe that appeared to be simple, fast and looked like a lot of fun to make. I will say that if you are willing to get your hands dirty and don't mind getting up and close with your food, this is the perfect recipe. Before the end of this process you hands will be covered in egg and Chex cereal, along with oil residue from the frying process. Regardless of the intense mess, it is a lot of fun and great for building memories. You will never know how much you missed chicken nuggets until you try these. So next time you are pondering what to have for dinner, embrace the inner child in you and make some delicious chicken nuggets. 


Tuesday, September 13, 2011

Spaghetti Squash with an Italian Twist


Light the candles and get ready for something great. This dish is perfect for those nights where you want something filling, but not all the carbs. 

 Ingredients:


Spaghetti Squash
Olive oil
Vinegar 
5 slices of salami, shredded 
8 small leaves of Basil, shredded
1 teaspoon of goat cheese, crumbled
25 small cherry tomatoes, halved
20 Greek olives
8 artichoke hearts, sliced
Salt and pepper to taste


Step 1: Get 1 medium sized spaghetti squash and cut it in half horizontally. Note: This will be VERY difficult, so be careful.... these things are slippery!


Step 2: Next, preheat the oven to 400 degrees.


Step 3: Place the spaghetti squash, cut side down, in a deep casserole dish with an inch of water at the bottom. Once oven is ready, cook the squash for about 50 mins or until tender. You should be able to easily scrape the inside of the squash and create a spaghetti type string.


Step 4: While the squash is cooking, prep all the other ingredients that will be going into the dish such as cutting the salami, basil, tomatoes and artichoke hearts. For this recipe, I decided to use tomatoes, artichoke hearts, basil, salami, Greek olives and goat cheese. Once all is prepared, take squash out of the oven and let it cool. Once cooled, scrape the squash and put into a bowl. Gently toss with a little bit of olive oil, and vinegar to taste, along with all the other ingredients. Finally, serve and enjoy!!! 


     I was browsing in the grocery store, trying to come up with something for dinner when I happened to stumble upon a spaghetti squash. Now, every time that I have tried spaghetti squash in the past, I was never a fan, however, I thought I would give it another shot. I made it my personal mission to make a dish that was healthy and delicious, yet one that would incorporate this vegetable. So, knowing that this squash mimics pasta, I decided to do what I normally would have for a simple pasta dish. Naturally, spaghetti squash is a mild vegetable which has the ability to take on the taste of other ingredients within the dish. I was really craving Italian food but not really feeling like pasta, so I decided to use the squash. Overall, this dish turned out great! It is filling and delicious and I promise you won't be missing those carbs. So next time you are craving pasta, consider using spaghetti squash; you might actually surprise yourself. :D Enjoy


Friday, August 26, 2011

Pumpkin Spice Bread


Pumpkin spice bread is all one needs when having a nice little get together with friends or celebrating the holidays. It's sweet, yet jam packed with flavor, you don't want to miss out.  

**This recipe was adapted by Allrecipes.com **


Ingredients:


1 1/2 cups of gluten- free flour (e.g Bisquick)
1/2 teaspoon salt
1 cup sugar
1 teaspoon baking soda
1 can of pumpkin puree 
1/2 cup olive oil
2 eggs, beaten
1/4 cup water
1/2 teaspoon all spice
1 teaspoon cinnamon 
1/2 cup chopped walnuts 


Method:

1. Preheat oven to 350 degrees. Next mix together all dry ingredients (flour, sugar, salt and baking soda)
2. In a separate bowl combine all wet ingredients (pumpkin puree, eggs, oil, water, and spices). Once combined add chopped walnuts.
3. Finally, combine the wet and dry ingredients until smooth.
4. Pour into a well sprayed or buttered pan (9*5*3) inch loaf pan. Then bake for 50-60 mins. or until toothpick comes out clean.

I recently was invited to a tea party and struggled to think of what kinds of treats are often found at tea parties. Usually, they consist of finger foods that most likely entails thin crackers with cream cheese and cucumber slices on top, but considering that both my friend and I are gluten-free, those types of foods would be an issue. Personally, I think of soft scones, light pound cake, dainty finger sandwiches and drinking with your pinkies up. So, I finally decided to do a spin on pound cake and make a pumpkin loaf instead. Knowing that pumpkin was my friend's absolute favorite, I thought it would be a good choice. It is packed with flavor but is extremely light and satisfying. I recommend sprinkling a mixture of cinnamon and sugar on top of the loaf, right as it comes out of the oven. This recipe would be the perfect dessert for any fall holiday party or even a nice sweet treat for a simple tea party. Either way, your guests will not be disappointed. Hope you enjoy!! :D

Thursday, August 18, 2011

Tangy Mini Lemon Tarts


One bite and you're on your way to taste bud heaven. These mini tarts are just enough to quench any lemon craving.


Ingredients:


Crust:
1 cup white rice flour
1/4 cup sweet rice flour
1/2 teaspoon of salt
1 stick of butter, softened
1/3  cup of granulated sugar
2 teaspoons of vanilla extract


Filling:
3 eggs, separated
2 lemons (small)
1 can of condensed milk (unsweetened)
1/8 teaspoon of salt


****The filling and crust recipes have been adapted from website Cooks.com and blog Gluten-free Tuesday. 


Method: preheat oven to 350


Crust directions:
1. Mix together both flours and salt into a bowl until fully combined. 
2. Next, beat together the butter, sugar and vanilla extract until a nice paste is formed. 
3. Once the paste has formed add the dry ingredients to the wet slowly. After about 30 seconds a nice crumbly dough should have formed. Then beat on medium speed for another 2 mins. until dough has formed.
4. Lightly spray the mini cupcake pan and press the dough into the tin forming a thin crust in each hole. 
5. Cover with plastic wrap and refrigerate for a minimum of 2 hours. 


Filling Directions:
1. First grade the rind of the lemon to get lemon zest, then juice both lemons. Make sure you strain the lemon juice so you don't get any pits in the filling.
2. Beat the egg yolks then add the lemon juice, zest, condensed milk and salt to the mixture. Mix together well until blended.
3. Next beat the egg whites in a separate bowl until they are stiff, then gently fold into the previous mixture. 
4. Finally, pour lemon mixture into the mini cupcake tins and and the bake in the oven for about 30 mins.


My sisters and I recently decided to throw a little dinner party for a friend of ours who was visiting from out of town, but struggled to think of a nice, light dessert to serve. We thought of all our options, from chocolate covered strawberries, to ice cream, to cupcakes, until we finally decided on mini tarts. Let's face it, who doesn't love something that's mini? The smaller the better in my opinion.

I've been craving everything lemon lately, so naturally I wanted to make a lemon custard tart. These tarts ended up being pretty time consuming, having to chill the crust for a few hours, but they were totally worth the work! They are tangy, sweet and super satisfying. Although I must warn you, it is almost impossible to eat just one.

I ended up having a lot of the lemon custard filling left over so I decided to pour the extra filling in small ramekin dishes to eat as a plain custard. In fact, I highly recommend doing this because the custard by itself was almost as good as the tart itself.

If you're a lemon lover like I am (can you tell?), then you must try this recipe. You will be pleasantly surprised by the strong lemon flavor, which so perfectly complements the sweet, buttery crust. The only thing that could make this tart better is to top it off with a healthy sized dollop of whipped cream! 


Wednesday, August 3, 2011

Lemon Poppy Seed Muffins


What’s better than waking up to the smell of freshly baked muffins, fresh from the oven? These lemon poppy seed muffins are sweet, tangy and leave you craving more


Ingredients


1 1/2 cup flour (Gluten Free Bisquick)
2 teaspoons baking powder
1/2 teaspoons salt
1 cup plain Greek yogurt (organic optional)
1 cup sugar
3 large eggs, room temp
zest of 1 1/2  small lemons
juice of two lemons
1/4 teaspoon of lemon extract
1/2 cup of vegetable oil
1 1/2 tablespoons of poppy seeds

Method
1. Preheat oven to 350, then prep items
2. Mix dry ingredients ( flour, baking powder, salt)
3. In a different bowl mix wet ingredients (yogurt, sugar, eggs, lemon and vanilla extract). Slowly, add the dry ingredients to the wet mixture and stir until combined and smooth.
4. Gently fold in the vegetable oil and poppy seeds. ( do not over mix)
5. Pour into muffin tins about 2/3 full in each
6. Bake for about 20 mins. or until toothpick comes out clean. Then let the muffins rest for five mins. and then ENJOY!


Now that I’m done with work for the summer I have much more time to spend doing what I love – cooking! Dana had requested that I bake her something delicious – her only requirement was that it was something lemon. Well, Dana has been talking about muffins for weeks now, so I decided I would make her some Lemon Poppy Seed Muffins.

The whole idea of lemon muffins came from a dinner party that our friend had hosted earlier in the week. A friend had brought the most delicious looking muffins I had ever seen – mini lemon muffins! (The fact that they were mini made them even better) However, to my misfortune these delicious muffins were not gluten free, which ultimately means they are off limits. With these muffins taunting my mind, Dana and I decided to give it a try.

I had browsed through numerous recipes and they all seemed good, but I was afraid they would lack flavor. That’s why I decided to add extra lemon juice and lemon extract than originally called for in the recipe. Just to make sure there was a lot of the delicious, tart lemon flavor I crave. Unfortunately, I may have added too many poppy seeds as it seemed to over power the lemon more than I would have liked, however, it was still overall very satisfying. So if you are a muffin lover like myself, and love the sweet, tartness of lemons than this recipe is for you. You won’t be disappointed!


Wednesday, July 6, 2011

Banana Ice Cream


Recipe from the blog The Kitchn 

Ingredients

3 large bananas (more or less depending on how much you want to make)

Method

1. Slice the bananas and then place in the freezer for 1 1/2 hours
2. Put frozen bananas into a food processor and continue to pulse until smooth. You may have to stop to scrap the sides down with a spatula, but it will eventually become a cream
3. Serve and EAT!!!

Dana is pretty much the best sister ever for finding this recipe for I was seriously on the edge with my new diet... The whole cutting out sugar thing was not working for me, especially since it was Dana's birthday! I didn't want to have to sit and watch my whole family eat cake or ice cream so, she found an alternative. This recipe is MAGIC!!! Not only does it only include one ingredient, but it allowed me to eat ice cream! That is pure joy for me, since that is my number one weakness. Some might say, it just tastes like mushed up, cold bananas and I have to agree with them. However, this is so much more for people who are unable to eat ice cream regularly or want to lose weight. Ice cream no longer has to be put on restriction for we have stumbled upon an easy way to get our fix. I highly recommend this to anyone who is a banana lover like I am because once you try it, you will never stop eating it! 

Sweet or Chocolaty Donuts


This recipe has been altered from the Living Without magazine along with an Alton Brown glaze recipe. 

Ingredients

1 1/4 cups white rice flour
1 cup granulated sugar
7/8 cup potato starch
1/2 cup tapioca starch
1/2 cup plus 1 teaspoon chickpea flour or soy flour
4 teaspoons xanthan gum
1 teaspoon salt
1 3/4 teaspoons baking powder 
7 1/2 teaspoons instant dry yeast
1 1/4 cups of warm milk or your choice or water
1 1/2 sticks of butter, melted
2 large eggs, lightly beaten 
4 cups vegetable oil (or more)
-Extra sugar, powder or cinnamon

Method:

1. Place rice flour, granulated sugar, potato starch, tapioca starch, chickpea flour, xanthan gum, salt, baking powder and dry yeast in a bowl of stand mixer fitted with the paddle attachment (or hand mixer) Beat briefly to combine.
2. Add milk, melted butter and eggs to dry ingredients. Beat for 5 minutes at medium speed.
3. Let dough rest for 20 minutes in a warm, draft- free area. 
4. Cut 5 by 5- inch square of parchment paper. Spoon dough into pastry bag fitted with the widest tip or use a plastic bag with the bottom corner cut off to create an opening. Pipe a donut shaped circle onto each parchment square. Set square on baking sheets and let proof for 20 minutes in a warm, humid environment. 
5. In a deep skillet of electric fryer, heat oil over medium heat until oil reaches 350 degrees. Gently slide 3 or 4 donut sheets into the oil and fry 4 to 6 minutes or until golden brown. Use a slotted spoon to remove the paper and gently turn the donut. Cook another 2 to 3 minutes. Remove to a tray lined with several sheets of paper towels. 
6. While still warm,sprinkle donuts with sugar, powdered sugar or cinnamon if desired. 

**If you want to bake the donuts instead of frying them, after step 3, do the following:**
1. Spoon dough into a pastry bag fitted with the widest tip or use a plastic bag with the bottom corner cut off to create an opening. Pipe the dough into a donut mold, filling it up about halfway.
2. Bake in a pre-heated oven (at 350 degrees) for 8 minutes. Next remove the tray from the oven, flip the donuts over in the mold, and put them back in the oven for another 2 minutes, or until golden brown.

Glaze Ingredients

1/4 cup whole milk
1 teaspoon vanilla extract
2 cups confectioners' sugar 

Method
1. Combine milk and vanilla in a medium saucepan and heat over low heat until warm. Sift confectioners' sugar into milk mixture. Whisk slowly, until well combines. Remove the glaze from heat and set over a bowl of warm water. Dip donuts into the glaze, 1 at a time, and set on a draining rack placed in a half sheet pan for 5 minutes before serving.

Chocolate glaze ingredients

1/4 cup semisweet chocolate chips
1 Tablespoon butter
1 Tablespoon corn syrup
1 Teaspoon hot water

Method
In a medium bowl, microwave chocolate chips, butter and corn syrup on 50 % power for 1 minute, stirring frequently until completely melted. Stir in 1 teaspoon of hot water, until the glaze is thick and smooth. Add another teaspoon hot water if the glaze is too thick. Use immediately to glaze donuts. 


Who doesn't love a good donut? Since I have been on my gluten-free diet I have been deprived of my donut cravings, so Dana and I decided to mess around in the kitchen and try to create some delicious donuts that we both could eat. Our first attempt was on Easter and it was a major success. We found this recipe and found it to be so delicious we almost ate the entire batch right out of the fryer. Even my dad said they were really good. The second the donut batter hits the hot oil you get the sweet aroma of fried dough. It's light, fluffy and golden brown in a way that is familiar to anyone who has ever had a donut. For me, donuts remind me or waking up early and going garage sale hunting or those mornings right before our soft ball games. So I was super excited to be able to make gluten-free donuts that were delicious.

The second attempt at making the donuts, we had decided to double the batch so we would have extras to take into work. One of my co-workers was just diagnosed with Celiac so I wanted to make a treat for her that she could enjoy. You should have seen her face when she found out they were gluten-free. Needless to say, all the donuts were gone in the first five minutes.

However ,the second time we made the donuts we decided to try baking them instead of frying them so they wouldn't get soggy overnight, but they turned out slightly different. The taste was the same, but the texture was a little more dense. The one that was fried seemed much more light and fluffy. But the difference in texture might have been because of the alterations we had made to the recipe. In the second attempt we used less potato starch and more tapioca starch because we had run out and we figured they must act relatively the same. Regardless of which way you choose on making these donuts, they will easily satisfy your cravings.  Donuts no longer have to be for only those who can handle the "gluten."

Another note I may add: the regular glaze seemed to be super sweet so use lightly instead of dunking them.

Tuesday, June 21, 2011

Coconut Curry Fish or Chicken


Sweeten up dinner with a light, fresh salmon or chicken dish. You can't beat the taste of the coconut curry sauce with tender vegetables inside. It will make any night a special one! 


Step 1

Step 2 

Step 3

Step 4

Step 5

Ingredients:
2 Tbsp coconut oil
4 cloves of garlic, pressed
3 ribs of celery, sliced
2 inches of ginger, peeled, grated
4 carrots, shredded
1 tsp Fish sauce (optional)
1/2 tsp Thai Kitchen green curry paste
3 small zucchini sliced
1 cup green beans, trimmed and cut in half
1 Can Thai Ktichen Coconut Milk
1 lb of cubed white fish (or chicken)
5 leaves fresh basil, thinly sliced
Directions:
1.  Heat oil in large frying pan on Medium high
2.  Add garlic and celery.  Stir for 4-5 minutes until crisp-tender
3.  Add carrots and ginger.  Stir for 5 minutes.
4.  Add Fish sauce, curry, 1 cup of broth, zucchini, and green beans.
5.  Cover and let cook for 5 minutes.
6.  Shake can of coconut milk then add to pan.  Next add the remaining broth.
7.  Bring to low boil then add meat.  Reduce heat to medium.  Cover and let cook for 10 minutes for fish, 15 - 20 for chicken.
8.  Spoon into shallow bowl and top with fresh sliced basil.


This recipe my mom had found from the website LivehealthWise.com 

My mom discovered this recipe the other day while browsing the internet for recipes I could try. She was extremely tired of hearing me complain about how I don't have anything good to eat since I started my diet. To be honest, I really miss eating Indian food, or anything flavorful with spices like curry. She had stumbled upon this website and asked me about it, so after reviewing the recipe I thought I would give it a try. I will admit, I am almost always willing to try anything involving coconut milk or curry, however, I was a little unsure of how this dish would turn out. In the end I was pleasantly surprised and I must say this is one of my favorite dishes! Regardless of if I am on this diet or not I would probably still eat this dish no matter what! In the first bite your taste buds are introduced to numerous flavors that blend so well together that it leaves you craving more. It is simply delicious. Plus, once you reach the salmon or chicken, you will be in for a sweet surprise. It literally melts in your mouth and it is so soft and sweet it is unbelievable. I prefer this way of cooking my fish because there just doesn't seem to be any other way to get it as soft and tender as this. If you are a fan of fish or chicken I would definitely recommend this recipe in a heart beat!!! I don't know what could be better than this recipe for it meets all the requirements for a great meal: hot, sweet, fresh and filling! Who could ask for anything more? 

Sunday, June 19, 2011

Lemon Yogurt Herb Chicken


Freshen up some plain old chicken with fresh lemon yogurt herb sauce which can be used as a main dish or a nice addition to a salad.


Step one: Get a glass bowl and mix together the following herbs; parsley, thyme, rosemary, paprika, coriander seeds, lemon juice, along with lemon rind plus salt and pepper. Slowly stir into the yogurt.


Step two: Place chicken in a deep dish and pour sauce over the chicken evenly, cover with foil tightly and place in a preheated oven (350) for approx. ten minutes.


Step three: Finish cooking on stove top for another 10 min or until cooked through.

Ingredients:

1/2 cup plain coconut yogurt
2 cloves of garlic, crushed (1 tsp. minced)
a healthy pinch of the herbs (parsley, thyme, rosemary) 
1 Tb. Paprika 
1 Tb. Ground coriander seeds 
Graded rind and juice of 1 lemon
1 Tsp. salt
1/2 Tsp. pepper
2 Tbs. sugar (optional) 
** original recipe called for sugar but we decided to not use it

As you all may know I love my proteins, however, recently I have been in a slump when it comes to chicken. Chicken has just become dull and unappealing so I needed a way to spice it up and make it more attractive to my taste buds. Dana was surfing the web and found this great recipe from a blog called Adora's Box in which we adapted due to my diet. Normally the recipe called for one whole chicken but instead we changed it to chicken strips that way we could use it for other things like salads, not to mention that it just cooks faster. Plus, we decided to use coconut yogurt (plain) rather than normal just because I am unable to use any other types of yogurt. And we also decided to take out the sugar in the recipe due to my diet. So, for those of you who are looking for delicious foods that are low in sugar this is an extremely easy and satisfying recipe. Thanks to Dana I learned to love chicken again and consider all the different possibilities that a chicken can be made.

Thursday, June 9, 2011

Sweet and Spicy Skewers


Sweet and spicy skewers grilled on the stove top or grill makes an excellent meal for a nice refreshing summer night.  


First, pick your ingredients I like to put red onions, zucchini, yellow squash and sweet and spicy Italian sausage. That way the sweetness from the onions once caramelized complements the tartness of the vegetables. Then top it off with slices of sausage to add flavor and some kick. 


Then place on the stove top or grill while turning it every few minutes. Overall, approximately 30 min on low heat, or just enough to make sure that the sausage is all the way cooked through. Finish off the dish with some freshly cut nectarines or peaches. 

I was running late and craving some sausage so Dana my sister came up with these skewers. They were so delicious I ate them so fast! There is nothing more satisfying than combining meat and vegetables on a stick. It just is an elegant way to eat and fun to make. The best part is that you can combine any vegetables you would like and adjust it to anyone's taste. See in my family, food is extremely hard to deal with just because everyone has different tastes. I am allergic to half the world's foods and Dana and I both have Celiac. Sara is a vegetarian and my dad doesn't like to try new things. Dana doesn't like seafood or relatively spicy food. My mom is like me and willing to try anything, but obviously you can see, dinner is a tough order. These skewer are probably the best way to personally make an order that everyone can enjoy! So if you are like my family I highly suggest you taste these skewers for they are delicious, simple and healthy. Enjoy!! 

Freshly squeezed Orange Juice Popsicles


Treat yourself to a summer delight that is actually good for you! Freshly squeezed orange juice full of vitamin C. Nothing like getting that beach body ready by eating something healthy and delicious.


First start by squeezing 5 large oranges and then strain the pits out so that way you only get  the pure orange juice. Next step, cut up one lemon and squeeze the lemon to get the juice. Once it has been strained, mix the freshly squeezed orange juice with the lemon juice.


Next pour the mixtures into the molds and freeze overnight. **You can use any Popsicle molds you want, sometimes a dixi cup works just as well.**


Once the juice has been frozen over it is ready to eat! Enjoy a nice healthy summery treat.

These popsicles saved my life! I was craving something sweet since I am not allowed to have sugar due to my new diet I had to think outside the box. Well, I decided that since it is summer I would want something cold and since ice cream is out of the question I will have to go to the next best thing. POPSICLES! Since I can't use any sugar I had to rely on naturally sweet fruits to give me that sweet taste that I crave.  I absolutely love orange juice, so why not just freeze it and put into a popsicle? I strongly suggest this recipe to anyone who has a sweet tooth but can't have ice cream or wants a nice healthy light snack. Plus, what a great way to stay cool in the burning heat of summer! 

Monday, May 30, 2011

Sweet and Savory Memorial Parfait


A sweet and savory parfait is a nice treat to celebrate the Memorial weekend and still be light and healthy. Filled with sweet coconut yogurt and tart berries makes the perfect combination that will put a smile on anyones face. 

Ingredients:

1 pint of plain coconut yogurt or any yogurt 
Strawberries
Blueberries
Raspberries
Blackberries 

Method:
1. Very simple, start with a layer of yogurt, about 4 big spoonfuls in order to get a nice thick base for the fruit.
2. Next go for the Strawberries. Make sure it is just enough to for a layer, you don't want to under or over stuff the parfait.
3. Then add another layer of yogurt on top of that. This one should be thinner than your first layer. 
4. Continue this process mixing the fruit until you end with a nice layer of yogurt on top. 
5. Serve immediately 

I was having a very difficult time finding something that I could eat that allows me to stick to my diet, but still be festive for Memorial day. So, I thought why not go for a parfait! This way I can substitute regular yogurt with coconut yogurt and still stick to my diet. Nothing is worse than being on a diet during summer or holidays. So, it is important to find recipes that are delicious and will not leave you feeling left out of all the celebration. I will admit before I found this recipe I did throw a little tantrum for I wanted nothing more than to eat ice cream or chips for the holiday. However, I couldn't bring myself to cheat so I just had to get my thinking cap on and be creative. I think in the end I made the right choice and I was super satisfied with the results. Overall, I has a great memorial weekend that was stress free and full of family and delicious food. I can only hope that yours was the same.